Something that I have become obsessed with wanting to make recently, but honestly haven't been bothered to do yet, is keto alfajores.
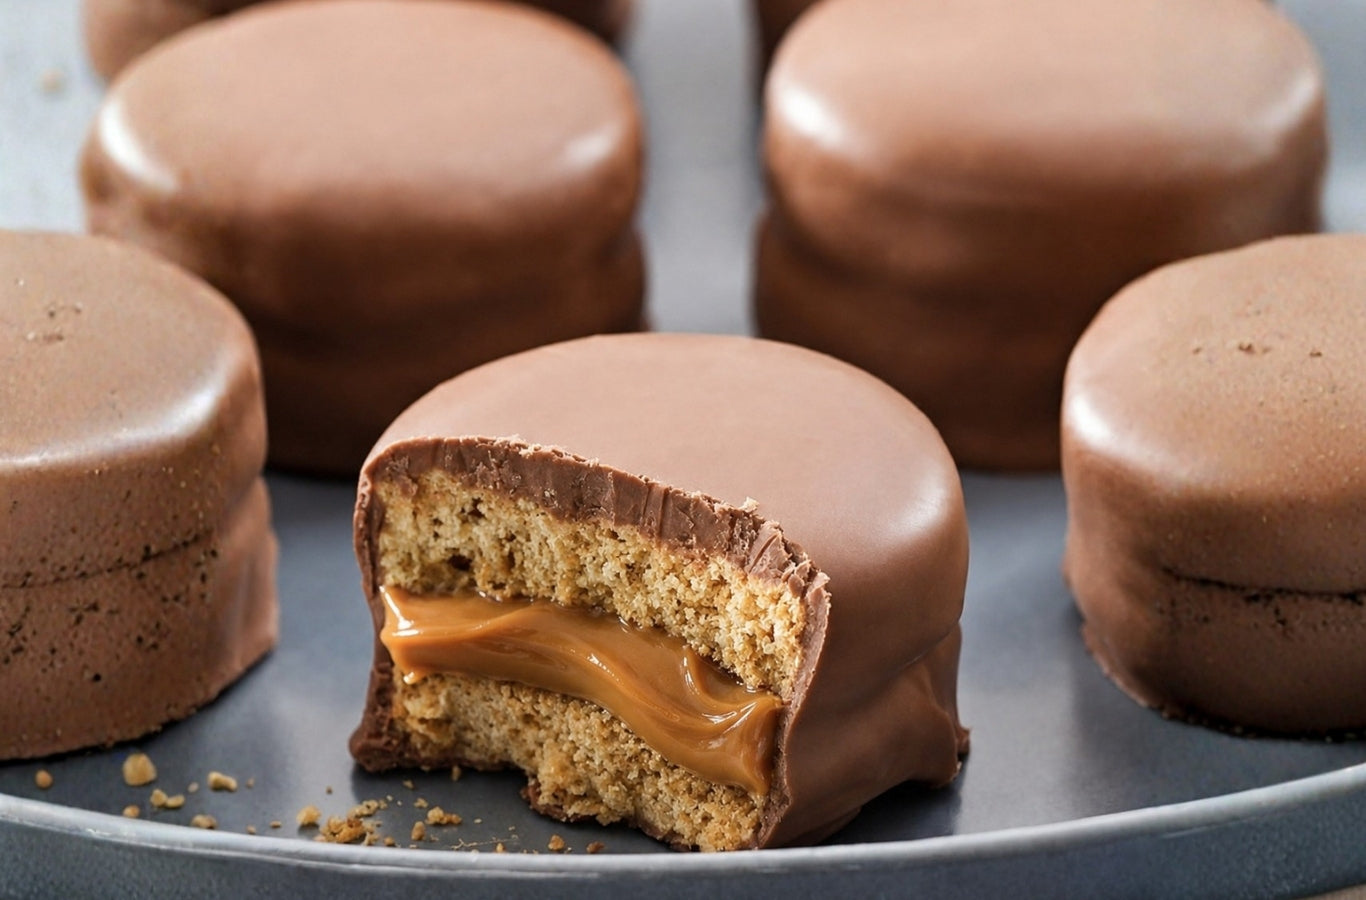
If you've never had one, alfajores are kind of like an Argentinian version of a wagon wheel. That's probably the easiest way I can explain them to an Aussie. It's essentially two shortbread biscuits sandwiching a thick layer of dulce de leche and completely covered in chocolate.
In my brain, I'm very sure I can make them keto. Shortbread? Easy. Chocolate? Easy. Dulce de leche? I think easy.
So why haven't I made them? Honestly, between working, renovating and growing a tiny human (oh yea, did you know that?), I’m lazy! The other issue is that the ingredient I actually want to use is allulose.
While allulose is available to buy in Australia, it still isn't approved for use as a food ingredient, which means no matter how much I'd love to make cool new products with it, I can't legally sell them.
You might see a few smaller businesses using it and good on them, but I don't particularly enjoy consequences, so until I know I won't get in trouble, I'll just wait.
Why allulose?
Well, allulose and erythritol are actually very similar. Everything about it is exactly the same except for 1 tiny change when producing it causes a structure change inside it. The result of that is that allulose caramelises and doesn't recrystallise like erythritol does.
If I was to make a caramel with erythritol, it would likely turn into a grainy, slightly minty shit storm and nobody wants that. Think back to the early keto dessert days. Everything was crunchy and everything tasted vaguely like toothpaste. (without sounding like a wanker – my products do not fit into that category nor have they ever because I just would not make that).
Sugar does a lot more than just make things sweet. It browns, caramelises, changes texture and holds moisture. This is where allulose starts getting really exciting because it behaves much more like actual sugar than almost anything else we currently have available.
So if I was going to attempt keto alfajores, here's where I'd start.
The Dulce de Leche
Normally dulce de leche is made by cooking sweetened condensed milk down until it becomes thick, rich and caramel-like.
To make it keto friendly, I'd probably use:
- 500ml cream
- 200-250g evaporated milk
- 150g allulose blend (or around 215g pure allulose)
- pinch of salt
- vanilla
Before anyone asks why I'm adding evaporated milk when it's higher in carbs than cream, I think it's important.
Traditional dulce de leche gets a lot of its flavour from the milk solids and lactose that are present in the milk. While I don't want heaps of carbs, I think some evaporated milk is important because it brings some of those cooked dairy flavours back into the equation. This is where keto baking often goes wrong. People get so focused on removing every carb that they accidentally remove half the flavour too.
If I was making it, I'd use a heavy-based frypan rather than a pot. Most people would instinctively reach for a saucepan, but we're not really cooking here, we're trying to get moisture out.
By using a frypan, I'm increasing the surface area, which means more moisture can evaporate at any given time and the reduction happens much faster. I'd add the cream, evaporated milk, allulose and salt to the pan, bring it to a boil and then immediately drop it back to a steady simmer.
From here, you're pretty much committed to standing at the stove stirring. At first it will seem incredibly boring and you'll question whether anything is actually happening, but as the moisture leaves it should begin thickening and developing colour.
The goal here is a gentle caramel colour. We're trying to create caramel flavours, not burn dairy.
If I had to guess, I'd expect this process to take somewhere around 30-45 minutes depending on your pan size, heat level and patience. Once it has thickened and developed a nice colour, I'd take it off the heat, add the vanilla and continue stirring as it cools slightly before putting it into the fridge.
This absolutely needs to be cold before you judge it because it should continue thickening as it cools.
And just to be clear, I haven't actually tried this yet. This is simply where my brain would start. If it didn't work, I'd adjust and try again. That's generally how recipe development goes.
The Shortbread
For the biscuits, I'd honestly just start with our Sweet Biscuit Base. Life is too short to reinvent things that already work.
The only thing I'd probably do differently is blitz the dry mix in a food processor first. Not much, just a few pulses. The goal isn't almond butter, it's simply getting the almond meal as fine as possible.
Because I want these biscuits to have a little more structure than normal, I'd follow the packet instructions but add one small egg as well.
Then I'd roll the dough out to roughly half a centimetre thick and cut circles. Do as many as you can, bring the scraps back together, roll again and cut more circles.
I'd place them onto a lined tray and pop them into the fridge for a bit. Cold dough behaves better, spreads less and is generally easier to work with.
Then I'd bake them at around 160°C, probably somewhere between 12-15 minutes, although it could be closer to 20 depending on how thick you've rolled them.
The goal here isn't colour, it's simply cooked.
Remember that almond meal stays soft when warm, so don't panic if they seem a little delicate when they first come out. Let them cool before judging them.
If I found they needed a little more dryness or structure, I'd probably add a tablespoon or so of raw WPI to the mix next time around.
Assembly Time
Now for the fun bit.
I'd start by assembling all of the biscuit sandwiches before worrying about the chocolate.
Take two biscuits and turn them upside down. Pipe or spoon a generous amount of dulce de leche onto one biscuit and gently sandwich the second biscuit on top. The keyword here is gently. You're making delicate little caramel sandwiches, not testing engineering limits.
Once they're all assembled, I'd put them back into the fridge while I sort the chocolate.
A Little Understanding Of Chocolate
Now we're going to melt some MELK.
A little understanding of chocolate first. MELK is real chocolate, not compound chocolate.
Why does that matter?
Because of temper.
Most supermarket chocolate these days contains less cocoa butter and more alternative fats. That's why you can generally melt it, throw it around and it will still set reasonably well.
Real chocolate doesn't work that way.
Chocolate contains stable crystal structures that give it that beautiful snap, shine and smooth mouthfeel. When those crystal structures break down, the chocolate will often set soft, dull or streaky.
If you've ever melted chocolate and wondered why it didn't set properly afterwards, you've probably destroyed the temper.
Now technically, once you destroy the temper, you need to re-temper the chocolate. That generally means heating it to around 45-46°C, cooling it back down to around 26°C and then bringing it back up to around 30°C.
Which is a pain.
So my preference is simply not destroying the temper in the first place.
My favourite melting temperature for MELK is actually around 32°C, so if you're using a thermometer, I'd aim for that. If you're using a microwave, do it in 10 second bursts and stir between each one.
The first few rounds will seem like absolutely nothing is happening. Trust the process.
Once it's melted and smooth, stop. Don't get greedy.
The Final Step
Drop one of your biscuit sandwiches into the chocolate and coat it completely. Lift it out, let the excess drip off and place it onto a lined tray.
Repeat until you've covered all of them, then pop them into the fridge and let them set.
Then you eat them and tell me all about it.
Because I've now spent all this time writing about keto alfajores instead of actually making keto alfajores. So if one of you beats me to it, I expect photos at least.
Bonus points if my dulce de leche theory actually works 😂
Share:
Palena Recipe Box: Tortilla Recipes
4 Keto Recipes to Make with Slow-Cooked Asian Pork Belly